Data is the lifeblood of any school — from student records to attendance, fees, and exam reports. But when upgrading to a modern School ERP software, one of the biggest challenges schools face is data migration — transferring old information without errors or loss.
In this guide, we’ll break down how to migrate data from old systems to a School ERP smoothly and securely, ensuring zero downtime and 100% data integrity.
At Chanakya ERP, we’ve helped hundreds of schools across India successfully transition from manual or outdated systems to fully automated ERP platforms.
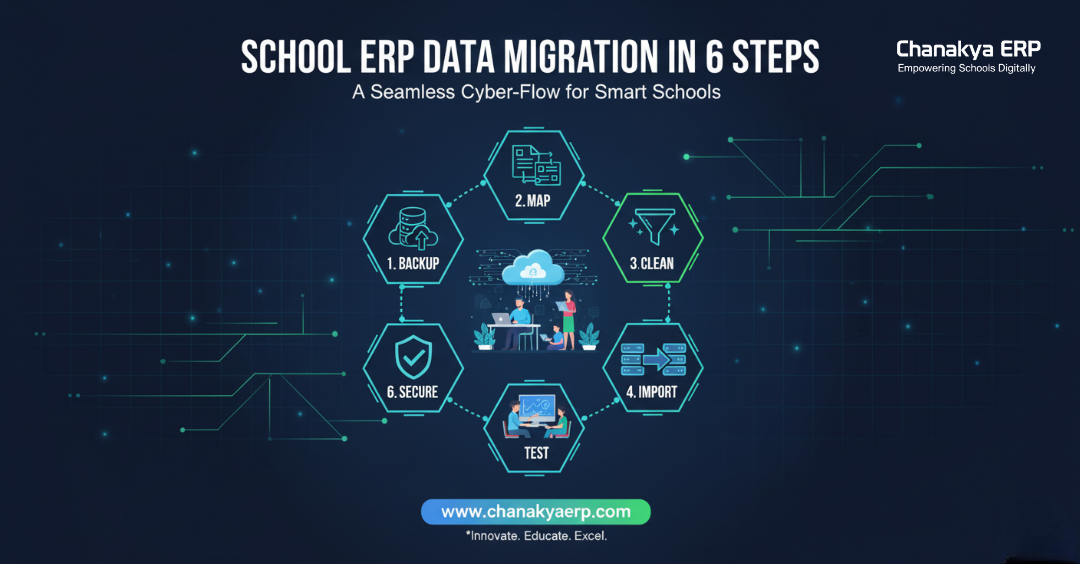
? Step 1: Analyze and Backup Your Existing Data
Before migration, it’s crucial to understand what data you have and where it’s stored — Excel sheets, legacy software, or on-premise databases.
? Key actions:
-
Identify all data sources: student info, staff details, attendance, fees, and results.
-
Remove duplicates and outdated entries.
-
Create a secure backup of all existing data before beginning migration.
Pro tip: Keep at least two backups — one local and one cloud-based — for extra safety.
Learn how Chanakya ERP simplifies data handling and automation with smart modules built for modern schools.
? Step 2: Define the Data Structure in the New School ERP
Every ERP system, including Chanakya ERP, has its own database structure. Mapping your old data into the new system’s format ensures that everything lands in the right place.
? Actions:
-
Identify what each field in your old system represents (e.g., “Student_ID” → “Admission_Number”).
-
Align column names and data types (dates, numbers, text).
-
Create mapping templates or use data import tools provided by Chanakya ERP.
Our experts assist schools in creating clean, organized data structures to ensure a seamless transition to ERP for schools.
? Step 3: Clean and Validate the Data
Garbage in = garbage out. Data quality directly affects ERP performance.
Before migration, validate data accuracy to avoid future operational issues.
? Checklist:
-
Correct misspelled names or wrong admission numbers.
-
Verify fee balances and attendance counts.
-
Standardize formats (e.g., DD/MM/YYYY for dates).
-
Remove inactive or duplicate student entries.
A well-prepared dataset ensures smooth migration and accurate reporting once the system goes live.
?? Step 4: Use Secure Data Import Tools
Now comes the technical part — importing your data into the new ERP.
Chanakya ERP offers automated import tools that make this process simple and secure.
? Migration process:
-
Upload cleaned CSV or Excel files.
-
Map data fields to corresponding ERP modules.
-
Use the ERP’s validation feature to detect mismatches.
-
Review test imports before final upload.
Chanakya ERP uses encrypted transfer protocols to ensure data remains private and secure during migration.
Learn more about our secure School ERP features designed to protect sensitive school data.
?? Step 5: Test, Verify, and Train Your Team
After migration, it’s important to test and verify that every record has transferred correctly.
This is also the time to train teachers and admins on using the new system.
? What to do:
-
Cross-check 10–15 random student records for accuracy.
-
Validate reports like attendance, fee summaries, and results.
-
Provide training on new ERP workflows and dashboards.
? Read our guide on How to Train Teachers and Staff for School ERP Adoption for a smoother rollout.
? Step 6: Ensure Data Security and Backup After Migration
Once all data is successfully migrated, the final step is to secure and back it up.
This ensures no data loss due to unforeseen issues like network failure or power outages.
? Security measures with Chanakya ERP:
-
End-to-end encryption during and after migration.
-
Automatic cloud backups every 24 hours.
-
Role-based access control for sensitive data.
-
99.9% uptime for uninterrupted operations.
Discover why schools across India choose us — Why Schools Trust Chanakya ERP.
? Quick Data Migration Checklist
| Phase | Key Action | Tools / Tips |
|---|---|---|
| 1. Preparation | Backup existing data | Cloud or external storage |
| 2. Mapping | Align data fields | Use mapping templates |
| 3. Cleaning | Remove duplicates | Data validation tools |
| 4. Import | Upload & test data | Chanakya ERP import tool |
| 5. Verification | Cross-check reports | Sample data validation |
| 6. Security | Enable backups | Cloud + local storage |
? FAQs: Data Migration for School ERP Software
1. How long does school ERP data migration take?
Typically 3–7 days, depending on data volume and complexity. Chanakya ERP’s migration experts make the process smooth and error-free.
2. Can we migrate data from Excel or old software?
Yes, our team supports migration from Excel, legacy ERPs, and manual systems through automated import tools.
3. Will data migration affect ongoing school operations?
No. Chanakya ERP performs migration in a sandbox environment to prevent downtime.
4. Is my data safe during migration?
Absolutely. We use SSL encryption, secure protocols, and cloud backups for maximum data protection.
5. What happens if data mismatches occur?
Our system auto-detects inconsistencies and provides a detailed error log for correction before final upload.
? Conclusion
Migrating data from old systems to a modern School ERP can seem complex — but with the right plan and partner, it’s a smooth, rewarding process.
Chanakya ERP ensures zero data loss, 100% security, and quick setup — helping schools embrace automation confidently.
? Request a Free Demo today to experience how easily your school can go digital.
Or, learn more about our School ERP Features to understand how we simplify operations from day one.